
Kitchen
Can We Hide Our Outlets?
On this page
Outlets are required. Staring at them isn't. Five ways we tuck them out of sight, without breaking code or cutting into a beautiful backsplash.
Welcome back to Kelly's Corner. Last month we went through the six trends showing up in Valley kitchens right now, the big-picture stuff. This month I want to zoom all the way in on one small detail that homeowners ask me about almost every single week, usually about ninety seconds after they fall in love with a slab.
"Can we hide our outlets?"
I love this question, because the honest answer is yes and no at the same time. Outlets aren't optional in a kitchen, code requires them, and for good reason. But where they go, which way they face, and what they look like once they're there? That's all design. That's our half of the conversation, and there's far more room in it than most people realize.
Why they're required at all
Before we hide anything, it helps to know what we're designing around. The National Electrical Code sets the ground rules for kitchen receptacles, and three numbers drive nearly every outlet conversation I have.
That first number is the one that surprises people. Any run of countertop twelve inches wide or wider has to be served. Twelve inches is a small strip of counter. Often exactly the pretty little section you were hoping to leave completely clean.
The second number is why they repeat down a wall. Spacing is measured so that no point along the counter sits more than two feet from a receptacle, which works out to roughly one every four feet. And the third number is the one that quietly makes my favorite trick possible. Hold onto it.
One caveat before we go further
- Code is updated on a cycle, and cities adopt those updates on their own timelines. What's described here reflects recent editions of the National Electrical Code.
- Which edition applies to your project depends on your jurisdiction and when the permit is pulled, and that genuinely varies across the Valley.
- Your licensed electrician is the authority. Confirm with them or your local building department before anything is finalized. This column is design guidance, not a code ruling.
Where they're allowed to go
This is the part that has actually changed in recent years, and it's why some of the advice floating around online is now out of date.
For an outlet that serves a countertop, the allowed locations have tightened considerably. It needs to be on or above that surface, and no more than twenty inches above it, or set into the countertop itself using an assembly specifically listed for that purpose.
Above the counter
The familiar backsplash outlet, but also the underside of your upper cabinets. Anywhere up to twenty inches above the surface qualifies.
In the counter
A pop-up or flush assembly set into the stone. It has to be a unit specifically listed for countertop installation.
Inside a drawer
Great for charging clutter. Treat it as a convenience upgrade rather than a replacement for the outlets that serve your counter.
No longer the answer
The side of the island, tucked below the counter edge. Standard practice for years, no longer accepted as a way to serve an island countertop.
That last card is the one that catches people out, because it used to be the hidden-outlet solution. The reason it went away isn't aesthetic. It's a safety change built on decades of injury data: when a slow cooker or a deep fryer plugs in below the counter, the cord drapes over the edge, and a passing hip or a curious toddler can bring the whole thing down. Once you've heard it explained, it's hard to argue with.
There's a second shift worth knowing. On islands and peninsulas specifically, receptacles are no longer automatically required based on countertop size the way they once were. If you skip one, though, provisions generally need to be left so an outlet can be added later without tearing into finished cabinetry and stone.
Kelly's tip: decide your island power plan before we template your countertops. A pop-up assembly needs a hole cut in the slab, and that cut is far easier to plan than to retrofit. This is the single most common "I wish we'd talked about this sooner" moment in my week.
5 Ways to Hide Them
Now the fun part. Inside those rules there's a lot of room to design, and these are the five moves we reach for most.
1. Under the upper cabinets
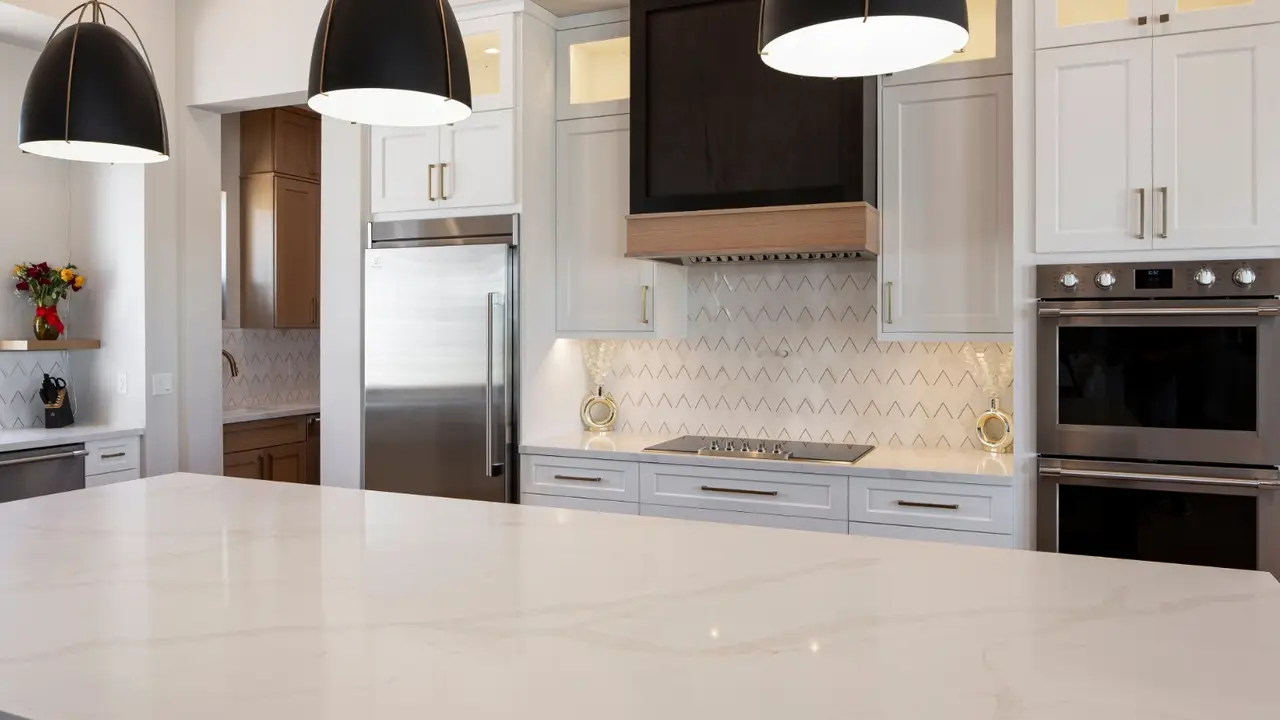
This is my favorite, and it's the one we used in the kitchen from this month's video. Rather than cutting outlets into the backsplash, we mounted them on the underside of the upper cabinets. Fully functional, easy to reach, and completely invisible unless you crouch down and look up.
Remember that twenty-inch number? Standard uppers sit about eighteen inches above the counter, which is exactly why this works. Pair it with the under-cabinet task lighting we talked about last month and the whole underside of your cabinetry becomes one tidy hidden utility strip, light and power in the same channel, neither one visible.
The payoff is the backsplash. In that kitchen we had a gorgeous Taj Mahal quartzite slab running up the wall, and punching a row of outlet boxes through that veining would have broken it up. Instead the stone runs uninterrupted. If you're investing in a full-height slab backsplash, this alone is worth planning around.
2. Pop-up outlets in the island
For islands, a pop-up assembly set into the countertop is the cleanest answer available. It sits flush with the stone when you don't need it and rises when you do. Down, most guests never register that it's there.
It also solves the code problem neatly, since an assembly listed for installation in a countertop is an approved location. So you get the uncluttered island you wanted and a compliant outlet in the same move, which, given how much of Valley life happens standing around the island, is worth the line item.
Two things to get right: confirm the specific unit is listed for countertop use, and get it on the plan before fabrication. Which brings us to the short list of decisions that have to happen early.
- Whether the island gets power at all, and if not, where the future provision goes.
- The exact location of any pop-up, so it lands clear of seating knees and the sink.
- Whether a prep sink or cooktop is going in the island, since that changes the whole electrical plan.
- Which cabinet holds a charging drawer, so the box gets roughed in behind it.
- Cover plate finish, so it can be ordered alongside your hardware.
What customers say
Phoenix homeowners love the results.
Showed up at their showroom / warehouse… picked out a countertop easily, scheduled, installed 2 weeks later. PHENOMENAL quality of installation.
Matthew S. · GoogleWe were able to find a countertop that fit our larger island without any seams, and at a great price as well.
Doug M. · GoogleGreat selections with reasonable price and very helpful workers.
Han D. · Google







3. In-drawer charging stations
A close cousin of the pop-up, and the fix for anyone tired of a phone-and-tablet pile living on the counter. An outlet installed inside a drawer keeps chargers, cords, and devices entirely out of sight, with the drawer front closing over the whole mess.
This one is a convenience addition rather than a substitute. It doesn't replace the outlets serving your countertop. But as an upgrade it's one of the most-loved things we put in a kitchen, right alongside the coffee station in a butler's pantry.
4. Cover plates that disappear
When an outlet does have to live somewhere visible, stop treating the cover plate as an afterthought. This is the cheapest, fastest improvement on this entire list, and it can be done long after the kitchen is finished.
Metal finishes
Brushed gold, satin nickel, matte black, oil-rubbed bronze. Pull the plate finish to match your cabinet pulls and faucet and the outlet stops reading as a utility. It joins the same family as everything else you chose on purpose.
Stone look-alike patterns
Plates made in marble and stone patterns. It won't be a perfect match, your slab is one of a kind and a printed plate isn't, but against a veined backsplash, from a few feet away, it does a remarkable job of dissolving into the wall.
Paintable plates
On a painted or tiled wall in a solid color, a paintable plate finished to match is the closest thing to invisible. Best on quieter walls where there's no veining to compete with.
Screwless plates
No visible screw heads, just a clean rectangle. Nobody consciously notices them, and everybody notices the builder-grade plate with two crooked screws next to a five-figure countertop.
5. Group them, align them, turn them sideways
The last one costs nothing and gets skipped constantly, because it happens on paper rather than in a catalog.
Three separate boxes scattered along a wall read as clutter. The same three ganged into one location read as a single deliberate element. So we group where we can, and we hold a consistent height along the whole run so the line stays level instead of stair-stepping. Under a cabinet, we'll often turn the outlet horizontal so it follows the line of the cabinet rather than fighting it.
And where a full-height slab backsplash is going in, we work with your fabricator on placement, because every cut through that surface is permanent. Deciding where the boxes land while the slab is still a drawing is a very different experience from deciding it afterward.
Comparing your options
Here's the quick version of how I weigh these when a homeowner asks which way to go.
| Approach | Best for | How hidden | Decide by |
|---|---|---|---|
| Under-cabinet | Protecting a full-height slab backsplash | Out of every normal sightline | Electrical rough-in |
| Pop-up in counter | Islands and peninsulas | Flush and near-invisible when down | Before stone templating |
| In-drawer | Phones, tablets, charging clutter | Completely concealed | Cabinet order |
| Finish-matched plates | Outlets that have to stay visible | Visible, but clearly intentional | Anytime, even post-install |
| Grouping & alignment | Every kitchen, at no added cost | Fewer, tidier, quieter | Design stage |
Not sure where your outlets should land?
Bring your plans to our Phoenix showroom. Our designers can walk your layout, flag the outlet decisions that have to happen before templating, and show you pop-up and cover plate options in person.
Tour the ShowroomMistakes I see in the showroom
Most outlet regret traces back to the same handful of missteps, and every one of them is avoidable if you catch it early.
Watch for these
- Deciding after the slab is templated. Pop-ups and in-counter assemblies need to be planned before fabrication. Afterward you're looking at a change order or a compromise.
- Assuming side-of-island outlets still work. They did for years. For serving an island countertop under current code, they generally don't.
- Forgetting the small counter run. That twelve-inch strip beside the range still has to be served. Plan it rather than discovering it at inspection.
- Skipping island power entirely. The island is where people actually work. Even where code doesn't force the issue, you'll miss it the first time you want a mixer out there.
- Treating the cover plate as leftover. Builder-grade white plastic against a full slab backsplash undoes a lot of good work to save a few dollars.
The one line I repeat most
Outlets are required. Ugly outlets are not. Every kitchen I've walked has had more hiding options than the homeowner realized. The trick is deciding while it's all still a drawing.
Frequently asked questions
Can you hide outlets in a kitchen?
Yes, though they cannot be eliminated. Electrical code requires outlets to serve kitchen countertops, but there is real flexibility in where they go and how they look. The approaches that work best are mounting them beneath the upper cabinets, setting a listed pop-up assembly into an island countertop, installing an outlet inside a drawer for charging, and choosing cover plates in a metallic or stone-look finish so the outlets that do stay visible read as an intentional design detail.
Are outlets required on kitchen countertops?
Yes. Under the National Electrical Code, any kitchen countertop or work surface twelve inches wide or wider must be served by a receptacle, and outlets must be spaced so that no point along the counter is more than twenty-four inches from one. That spacing works out to roughly one outlet every four feet. Local adoption of code editions varies, so confirm the specific requirements for your project with your licensed electrician or local building department.
Can you put outlets under kitchen cabinets?
Yes, and it is one of the cleanest ways to keep a backsplash unbroken. An outlet serving a countertop can be located above that surface as long as it is not more than twenty inches above it. Standard upper cabinets sit roughly eighteen inches above the counter, so mounting outlets on the underside of the upper cabinets typically falls within that limit while keeping them out of sight and easy to reach.
Are outlets still required on a kitchen island?
Recent editions of the National Electrical Code removed the requirement to install receptacles on islands and peninsulas based on countertop size, so installing one is now generally optional. However, if no outlet is installed, provisions typically need to be left so a receptacle can be added later without tearing into finished cabinetry or stone. Which edition applies depends on your jurisdiction, so verify with your electrician before finalizing the plan.
Can you still put an outlet on the side of a kitchen island?
Not as a way to serve the island countertop under current code. Mounting receptacles on the vertical side of an island below the counter edge was standard practice for years, but that allowance was removed, and the most recent revisions restrict below-counter placement further. The change was driven by injury data showing that cords draped over an island edge can be snagged by a passerby or pulled by a child, tipping hot appliances off the counter.
What is a pop-up outlet and is it code compliant?
A pop-up outlet is a receptacle assembly installed into the countertop itself. It sits flush with the surface when not in use and rises when you need it. Assemblies specifically listed for installation in countertops are an approved location for serving an island or peninsula, which makes them both a tidy design solution and a compliant one. The cutout has to be planned before the countertop is templated and fabricated, so the decision belongs at the design stage.
Do outlet covers come in finishes that match a backsplash?
They do. Cover plates are available in marble and stone look-alike patterns that blend into a veined backsplash at normal viewing distance, as well as in hardware finishes such as brushed gold, satin nickel, matte black, and oil-rubbed bronze. Matching the plate to cabinet hardware and plumbing fixtures makes a visible outlet read as a deliberate detail. It is the least expensive way to improve how outlets look and can be done after installation.
Does Superior Stone & Cabinet help plan outlet placement?
Yes. Superior Stone & Cabinet has on-site designers at its Phoenix showroom at 3479 E University Dr, plus free in-home estimates across the Valley and 3D renderings so you can see the plan before anything is built. Because decisions like island pop-ups change how the countertop is fabricated, they are best made before templating, and the team handles the electrical work itself so the whole project stays on one schedule. Call (602) 437-0088 or visit the showroom to get started.
Let's design a kitchen worth showing off.
From slab selection to the last cover plate, our Phoenix team handles the whole kitchen remodel, and bathrooms, too, under one roof. Stop by the showroom or request a free in-home estimate today.
Get a Free Estimate Or call (602) 437-0088 · Contact us · About SuperiorKeep reading
Related articles
2026 Kitchen Trends
Which kitchen trends are worth it? Kelly on double ovens, oversized islands, layered lighting, custom hoods, shelving, and butler's pantries.
Kitchen · July 3, 2026The Kitchen Work Triangle, Explained
The kitchen work triangle, explained by Kelly. NKBA measurements, common mistakes, the work-zones trend, and how Phoenix homeowners can make it work.
Granite Counters · March 19, 2025Prefabricated vs Slab Countertops
We break down the differences between prefabricated vs slab countertops so you can choose the countertop that best fits your project needs.

Visit the showroom & warehouse
Start your remodel with a visit.
See materials in person and talk with an on-site designer about design, materials and installation, all in one place. No appointment needed.
| Mon – Fri | 8 am – 5 pm |
| Saturday | 10 am – 3 pm |
| Sunday | Closed |
| Warehouse pickup Mon–Fri 8 am – 3 pm | |