
On this page
Your bathroom cabinet installation project can quickly go wrong if you choose an improper vanity size, potentially ruining your bathroom's look. Standard, off-the-shelf vanities rarely fit perfectly and often create wasted space and cluttered countertops. This complete guide walks you through every aspect of installing a bathroom vanity, from planning and measuring to installation and maintenance. Superior Stone & Cabinet, Phoenix's one-stop shop for kitchen and bathroom remodels, brings you this expert resource. You'll learn how to install a bathroom vanity correctly, whether you're tackling bathroom vanity replacement yourself or hiring professionals. Superior Stone & Cabinet can complete all work discussed here, including countertop installation (granite, quartz, marble), custom cabinetry, tile and flooring, with full remodeling services and free in-home estimates available.
Planning Your Bathroom Vanity Installation Project
Planning determines whether your bathroom vanity installation succeeds or becomes a disaster that gets pricey. You need to assess multiple factors before you purchase materials or start demolition work.
Assessing Your Current Bathroom Setup
Begin by documenting your existing plumbing and electrical locations. Note where your outlets, electrical switches, mirrors and plumbing currently sit. Keep your vanity in the same location. This reduces plumbing costs by a lot. Measure the distance between your hot and cold water lines for reference. Most sink supply lines feature two holes about 2-3 inches above the drain pipe. Your drain pipe should sit between 16-20 inches above your finished floor.
Check for existing outlets that might end up behind your new cabinet. Bathroom outlets must be at least 1 foot from the sink but within 3 feet. They cannot be within a zone that extends 3 feet horizontally and 8 feet vertically from your bathtub or shower.
Understanding Local Building Codes and Requirements
Bathroom remodels need permits. Minor cosmetic updates like painting may not need permitting. But significant alterations such as structural changes, plumbing adjustments or electrical rewiring mandate permits.
Bathroom remodels have to meet the building codes your city has adopted, so check with your local building department before work starts. Common requirements include: You need a minimum 20-amp GFCI protected electrical outlet within 36 inches of each bathroom sink basin. A bath exhaust fan with a minimum rate of 50 CFM is required. Shower and tub control valves shall be pressure balancing set at a maximum 120 degrees F. Toilets and bidets require a minimum 30 inches of total clearance, with 15 inches from the fixture's center to the wall and a minimum of 24 inches clear space in front.
Moving plumbing or gas lines requires an architect and additional permits. Getting approvals can take as little as two weeks but more often takes a couple of months.
Making a Detailed Floor Plan
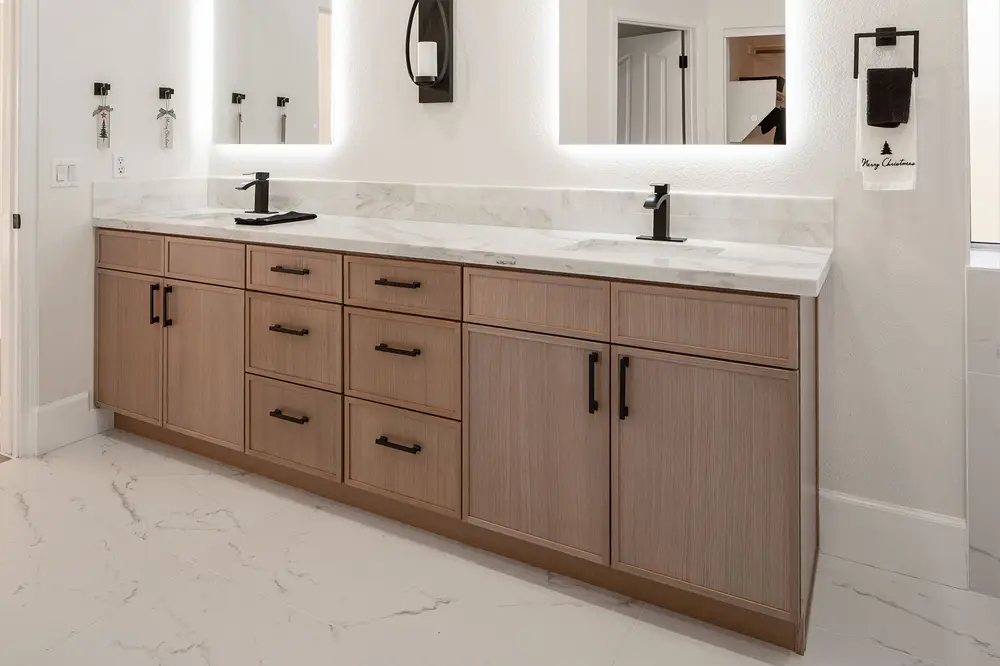
Sketch your bathroom space and note the toilet, shower, tub and any doors or windows. There should be at least 21 inches in front of toilet, tub and sink. A single vanity should line up with your existing plumbing. A double vanity needs careful planning. Ensure plumbing locations don't impede your drawers and cabinet space. You need at least 36 inches between your sink centers.
Account for how your bathroom door swings open and factor in the distance from the wall to the door's edge. Stand inside your rough framed shower to check if your elbow will hit the door and whether there's adequate space for your shower door to swing in.
Choosing Between DIY and Professional Installation
Professional bathroom remodeling takes about 23 days on average. DIY remodels can take up to a year. A new vanity installation is an easy-to-moderate DIY project if it's pre-assembled and requires only plumbing reconnections. But reconfiguring plumbing and electrical work, walk-in shower installations or full bathroom renovations require professionals.
DIY projects include hidden costs. You might find mold, cracked pipes or rotting wood behind walls. Mistakes mean buying new supplies and doubling your material cost. Professional installation comes with warranties on both materials and labor.
Planning Your Project Timeline and Budget
Bathroom remodeling costs vary widely depending on the scope of work, materials selected, and the complexity of your project. Set a realistic budget and include a buffer for unexpected surprises, unforeseen issues behind walls are common.
For a personalized estimate tailored to your specific project, contact Superior Stone & Cabinet for a free in-home consultation. Place material orders as soon as your design plan is finalized. Certain items have long lead times. Coordinate contractor schedules to line up with your timeline.
Superior Stone & Cabinet can complete all work discussed here. This includes countertop installation (granite, quartz, quartzite, marble), custom cabinetry, tile, flooring and full remodeling services, with free in-home estimates available.
Choosing the Right Bathroom Vanity Cabinet
Selecting the right vanity affects both function and longevity of your bathroom cabinet installation. Size mistakes create cramped spaces or wasted areas. Poor material choices lead to warping and water damage within months.
Determining the Correct Vanity Size for Your Space
Vanity dimensions directly affect how your bathroom feels and functions. Single sink vanities range between 18 and 72 inches wide. Double sink configurations span 60 to 72 inches wide. Standard depth sits between 17 and 25 inches. Height varies from 30 to 36 inches from the floor.
Width determines your storage capacity and sink size. It also determines whether the space feels balanced. A 36-inch vanity works well for guest bathrooms and provides adequate storage for daily essentials. Medium bathrooms benefit from 48-inch vanities that offer comfortable counter space without overwhelming the room. Primary bathrooms need 60 to 72 inches to accommodate double sinks with proper spacing.
Your vanity needs a minimum of 30 inches of floor space for walkability. Double sink vanities require 36 inches between each basin center to prevent morning elbow bumps. Compact vanities designed for smaller spaces can go as shallow as 16 to 18 inches deep, though standard depth remains 21 inches.
Selecting Materials That Withstand Moisture
Bathrooms expose cabinets to constant humidity and water splashes. Standard MDF swells and falls apart when exposed to moisture. But moisture-resistant MDF with added water-repellent agents handles humidity better. You can spot it by the green core. MDF cabinets that are sealed properly last 10-15 years depending on bathroom conditions.
Plywood outperforms solid wood in wet conditions. MR-grade plywood works for areas with light moisture. BWR-grade handles regular bathroom humidity, and marine-grade plywood takes constant water exposure. Waterproof plywood maintains its shape better than engineered materials when exposed to humidity.
Solid wood requires proper sealing and climate control to prevent warping or cracking. It expands and contracts with temperature and moisture changes. Stainless steel offers the gold standard for moisture resistance with built-in chromium protection that stops water and chemicals. Thermofoil cabinets feature MDF with a vacuum-sealed plastic coating that creates moisture-resistant durability.
Choosing Between Single and Double Sink Configurations
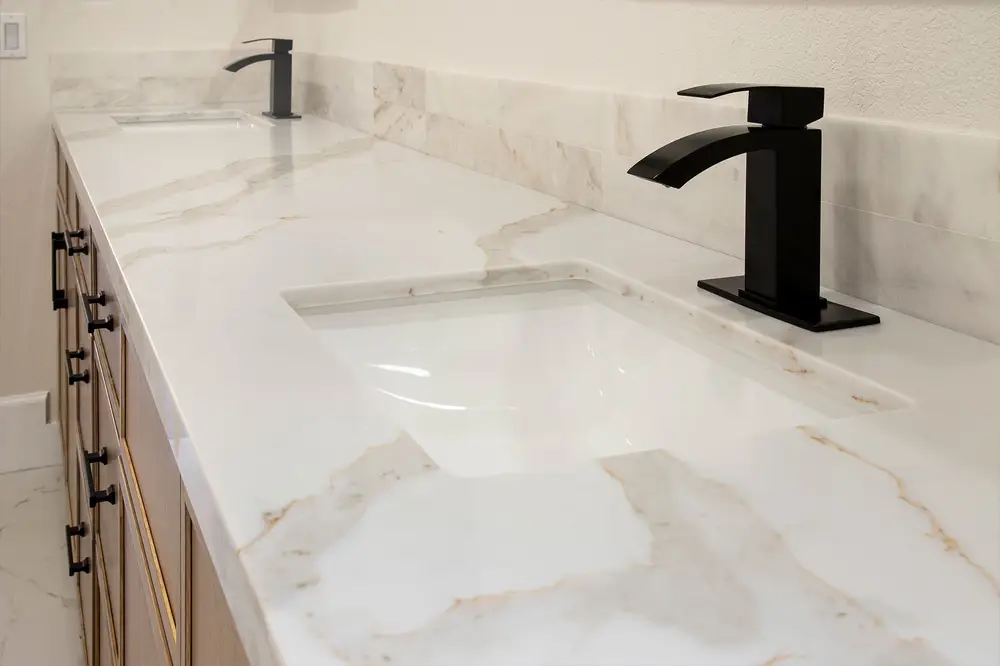
Single vanities save space and cost less due to fewer materials and simpler plumbing. They fit tighter spaces and leave room for additional storage cabinets or larger showers. But they create morning congestion in shared bathrooms and offer limited counter space for multiple users.
Double vanities allow two people to get ready at the same time and reduce conflicts during busy mornings. They provide ample counter and storage space while increasing home resale value. The tradeoff comes in higher costs and space requirements. Double vanities need much more room and extra plumbing work.
Finding a Style That Matches Your Bathroom Design
Your vanity should mirror your home's architecture or complement your interior design esthetic. Wall-mounted vanities with sleek hardware suit contemporary bathrooms. Rustic freestanding vanities fit farmhouse designs. Natural wood tones have become popular over white vanities, with darker greens and natural materials making a resurgence.
Superior Stone & Cabinet can complete all work discussed here, including countertop installation (granite, quartz, quartzite, marble), custom cabinetry, tile, flooring, and full remodeling services, with free in-home estimates available.
What customers say
Phoenix homeowners love the results.
Showed up at their showroom / warehouse… picked out a countertop easily, scheduled, installed 2 weeks later. PHENOMENAL quality of installation.
Matthew S. · GoogleWe were able to find a countertop that fit our larger island without any seams, and at a great price as well.
Doug M. · GoogleGreat selections with reasonable price and very helpful workers.
Han D. · Google







How to Measure for a Bathroom Vanity
Accurate measurements prevent mistakes that get pricey during bathroom vanity installation. Your measurements determine whether your new vanity fits or creates ongoing frustration.
Everything You'll Need to Measure
A 25-foot tape measure captures wall-to-wall dimensions, depth and clearance space. Steel tape measures provide more accuracy than fabric versions, especially across longer spans. A level helps you determine whether your floors and walls are straight, which affects how your vanity sits once installed. Older homes often have settling or slight irregularities that affect vanity placement.
You need paper and pencil to record measurements or roughly draw the space you're measuring. A calculator helps at the time you add countertop overhangs and clearances. A flashlight or phone light helps you see at the time you measure around plumbing or in dimly lit corners.
Step-by-Step Measuring Process
Clear the space of obstacles or clutter before starting. Measure the vanity's cabinet part to get the most accurate measurements, not just the countertop. Countertops add 1/2 to 1 inch on either side of the vanity width.
Start by measuring the total width of the wall from one end to the other and note baseboards, trim or corners that could reduce usable space. Measure in multiple spots if the vanity sits between two walls since walls aren't always straight. Leave a few inches of clearance on either side to ensure comfort and cleaning access.
Measure depth from the back wall outward to see how far your vanity can extend without blocking entryways, doors or other fixtures. Standard vanity depths range from 17 to 24 inches. Leave at least 30 inches of clear floor space in front of your vanity to allow comfortable movement.
Check the vertical space between the floor and any objects above the vanity, such as windows, shelves or mirrors. Standard vanity height sits between 30 and 36 inches.
Accounting for Plumbing and Electrical Outlets
Your drain pipe should sit between 16-20 inches above your finished floor. Most sink supply lines feature two holes that sit about 2-3 inches above the drain pipe. Mark where studs are located so you're ready to attach the vanity to the wall with a secure hold.
Common Measuring Mistakes to Avoid
Most bathroom vanity tops overhang the cabinet by 1 to 1.5 inches beyond the edge. Trim along the wall or baseboard eats into usable width and throws off tight measurements. Measure from the trim's outer edge, not the wall itself. Treat every space as unique rather than assuming standard sizes fit.
Superior Stone & Cabinet can complete all work discussed here, including countertop installation (granite, quartz, quartzite, marble), custom cabinetry, tile, flooring and full remodeling services, with free in-home estimates available.
Installing a Bathroom Vanity: Step-by-Step Process
Installation work begins once you've completed your measurements and purchased your vanity. Follow these steps for successful bathroom vanity replacement.
Removing Your Old Vanity and Preparing the Space
Shut off the water supply by turning the shutoff valves clockwise beneath your sink. Open the faucet to release pressure. Place a bucket under the P-trap and use an adjustable wrench to disconnect the drain pipes and water supply lines. Remove the outdated vanity and wall-mounted fittings. Cut through caulk joints where the vanity top meets the wall using a utility knife. Patch up the wall as needed before continuing.
Leveling and Positioning Your New Vanity
Put the vanity in its proper location and make sure it's level from side to side and front to back. Use shims to modify the vanity's height and ensure stability. Adjust with shims if floors aren't level. Cut off excess shims using a utility knife so they're even with the base side.
Securing the Vanity to the Wall
Use a stud finder to locate wall studs and mark them. Drill pilot holes through the vanity back panel into the studs. Screws should penetrate wall studs by at least 1.5 inches, which means you'll need 2.5 to 3-inch screws. Screw the brackets to the rear of the vanity and wall studs for stability. Check the level again before trimming the shims.
Installing the Countertop and Sink
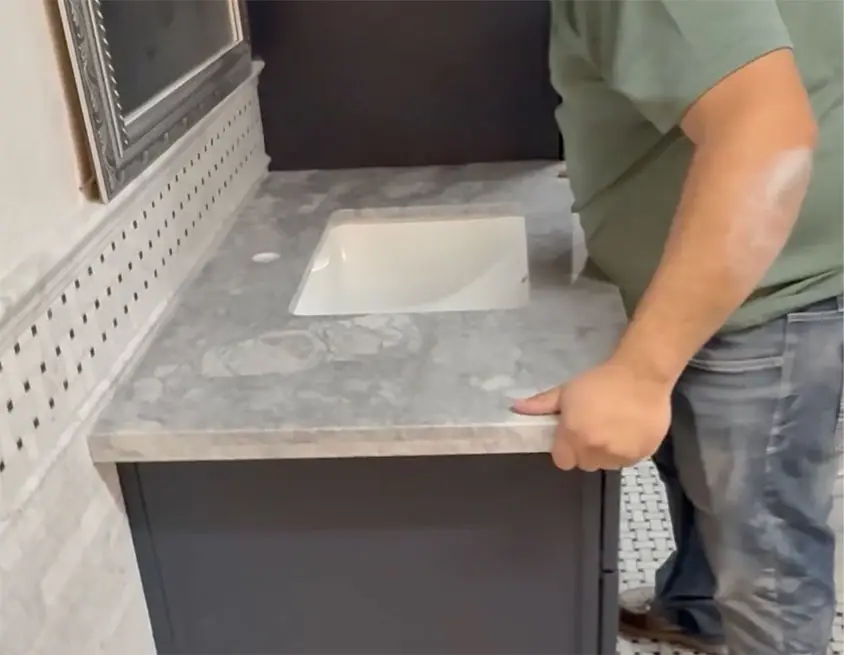
Apply silicone caulk to the top of the cabinet. Set the vanity top into position and press down. Attach the sink after installing the countertop. Use plumber's putty to seal the drain if the sink isn't secured to the countertop.
Connecting Plumbing and Faucet
Attach the faucet and drain assembly to the sink. Connect the water supply lines to the faucet and tighten with a wrench. Reconnect the drain pipe. Attach the tailpiece on the sink to the drain pipe.
Final Inspection and Leak Testing
Turn on the bathroom water supply. Run water into the sink bowl and check the drain pipes and water supply lines to find leaks. Tighten any connections if needed. Superior Stone & Cabinet can complete the work mentioned here. This includes countertop installation in granite and quartz, custom cabinetry, tile and flooring, plus full remodeling services. Free in-home estimates are available.
Maintaining Your Bathroom Vanity After Installation
Proper maintenance extends your vanity's lifespan and protects your bathroom cabinet installation investment. These guidelines keep your vanity looking new and functioning well.
Regular Cleaning and Care Guidelines
Water spills should be wiped away right away to prevent damage. Mix mild dish soap with warm water for everyday cleaning. Apply it with a soft cloth or microfiber towel. Dry surfaces with a clean towel after each cleaning to eliminate moisture and prevent water marks.
Harsh chemical cleaners, bleach, ammonia, or petroleum-based products break down protective finishes. Abrasive scrubbers, scouring pads, or steel wool create permanent scratches. Keep in mind that vinegar solutions damage most finishes due to high acidity.
Understanding Your Vanity Materials
Solid wood vanities require water-resistant sealant application and regular polishing every few months to create protective layers. Stone countertops need sealing at least twice yearly to prevent staining. They remain porous despite treatment. Laminate surfaces handle moisture well but suffer from persistent heat exposure. PVC cabinets resist water naturally without requiring waxing or polishing.
When to Call a Professional for Repairs
You should contact professionals at the time you notice deep cracks, mold growth, structural damage, extensive surface scratches, bubbling, warping, or persistent discoloration. Cabinet doors that won't close, drawers that stick despite adjustments, or sagging shelves indicate deeper structural problems. These issues require expert assessment.
Superior Stone & Cabinet can complete all work discussed here. This includes countertop installation (granite, quartz, quartzite, marble), custom cabinetry, tile, flooring, and full remodeling services. Free in-home estimates are available.
Conclusion
A successful bathroom vanity installation starts with planning and accurate measurements. Select the right materials and account for plumbing locations. Follow proper installation steps and your vanity will serve you well for years. Regular maintenance protects your investment and prevents repairs that get pricey down the road.
Superior Stone & Cabinet brings you this piece as Phoenix's one-stop shop for kitchen and bathroom remodels. You might be tackling a DIY project or prefer professional installation. Either way, you now have the knowledge to move forward confidently. Superior Stone & Cabinet can complete any work discussed here. This includes countertop installation (granite, quartz, quartzite, marble), custom cabinetry, tile and flooring, plus full remodeling services. Free in-home estimates are available.
Key Takeaways
Master these essential elements to ensure your bathroom vanity installation project succeeds and adds lasting value to your home.
• Measure twice, install once: Accurate measurements prevent costly mistakes - account for plumbing locations, electrical outlets, and leave 30 inches of clearance space in front of your vanity.
• Choose moisture-resistant materials: Select MDF with water-repellent agents, marine-grade plywood, or thermofoil cabinets to withstand bathroom humidity and prevent warping or water damage.
• Plan for permits and codes: Most bathroom remodels require permits, and electrical outlets must be within 3 feet of sinks while maintaining proper GFCI protection for safety compliance.
• Secure properly to wall studs: Use 2.5-3 inch screws penetrating at least 1.5 inches into wall studs, and always level your vanity with shims before final installation.
• Test thoroughly before finishing: Turn on water supply and check all connections for leaks, then maintain your investment with immediate water cleanup and gentle cleaning products.
Professional installation averages 23 days while DIY projects can take up to a year. Consider your skill level, available time, and the complexity of plumbing or electrical work when deciding between professional and DIY installation.
FAQs
How much does it cost to hire someone to install a bathroom vanity?
The cost of professional vanity installation varies depending on the scope of work, materials chosen, and whether plumbing or electrical adjustments are needed. Simple installations are generally less involved, while full replacements requiring plumbing reconfiguration will be more complex and reflect that in pricing
How long does it take to complete a bathroom vanity installation?
Professional bathroom remodeling takes approximately 23 days on average. DIY bathroom remodels can take significantly longer, sometimes up to a year, depending on your skill level and the complexity of the project. Installing a pre-assembled vanity with simple plumbing reconnections is much faster than projects requiring electrical or plumbing reconfiguration.
What clearance space do I need in front of my bathroom vanity?
You should leave at least 30 inches of clear floor space in front of your vanity to allow comfortable movement. For double sink vanities, ensure there are 36 inches between each sink center to provide adequate elbow room. There should also be at least 21 inches in front of the toilet, tub, and sink.
What type of materials work best for bathroom vanities in humid conditions?
Moisture-resistant MDF with water-repellent agents, marine-grade plywood, and thermofoil cabinets perform well in humid bathroom environments. Stainless steel offers the highest moisture resistance, while properly sealed solid wood can also work if maintained correctly. Avoid standard MDF as it swells and deteriorates when exposed to moisture.
Do I need a permit to install a new bathroom vanity?
Most bathroom remodels require permits, especially if you're making structural changes, adjusting plumbing, or rewiring electrical components. Minor cosmetic updates like painting typically don't need permits, but significant alterations do. Check with your local building department, as obtaining approvals can take anywhere from two weeks to a couple of months.
Keep reading
Related articles
Bathroom Cabinet Upgrades: 7 Steps to A Luxurious Retreat
Planning a bathroom remodel? Check out the 7 steps you need to follow to choose the right bathroom cabinets.
Remodeling · August 10, 2026Remodeling (Bathroom): Master vs Guest Bath ROI
Master vs guest bath ROI: which Phoenix bathroom to remodel first, and what the resale data really shows. Free in-home estimates.
Bathroom · April 2, 20267 ways to make your bathroom stand out from the crowd
Here are seven tips to help you transform your Phoenix bathroom into a showpiece. Just stop by Superior Stone & Cabinet in Phoenix, AZ.

Visit the showroom & warehouse
See the cabinets in real kitchens.
Open the doors, compare door styles side by side, and talk with an on-site designer. No appointment needed.
| Mon – Fri | 8 am – 5 pm |
| Saturday | 10 am – 3 pm |
| Sunday | Closed |
| Warehouse pickup Mon–Fri 8 am – 3 pm | |